Web App是指基于Web技术开发的应用程序,通过浏览器访问,可以实现多平台、多设备的通用性。开发Web App的过程,主要涉及到三个方面:前端、后端和数据库。下面将详细介绍这三个方面的开发原理。一、前端开发前端开发主要涉及HTML、CSS、JavaSc
2024-01-10

中文化、本土化、云端化的在线跨平台软件开发工具,支持APP、电脑端、小程序、IOS免签等等
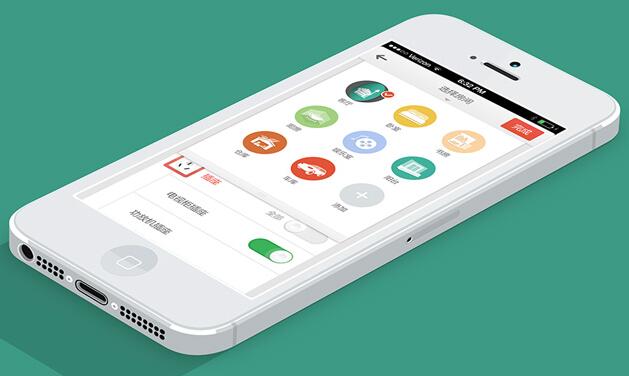
导航栏是APP中非常重要的组件之一,通常作为多个页面之间的切换入口,方便用户快速切换页面,提高用户的使用体验。但是在不同的手机尺寸、屏幕分辨率和屏幕比例下,导航栏的布局和显示效果可能会出现不一致、偏移、变形等问题,影响用户的使用体验,因此需要进行适配。本文将介绍APP开发中导航栏适配的原理和实现方法。
一、导航栏的原理:
在APP中,导航栏通常由以下几个组件构成:
1.标题:通常表明当前页面的功能或名称,位于导航栏的中央。
2.左按钮:通常用于返回上一个页面或打开抽屉,位于导航栏的左侧。
3.右按钮:通常用于打开菜单、分享、搜索等功能,位于导航栏的右侧。
这些组件的位置和大小通常是通过布局参数来设置的,例如Android中的LinearLayout和RelativeLayout。在不同尺寸的手机上,导航栏的位置和大小也会随之改变。
二、导航栏适配的原则:
为了保证导航栏在不同的设备上正常显示,可采用以下原则:
1.使用约束布局:约束布局是一种强大的布局方式,可以通过规则和限制来确定组件的位置和大小。它可以在不同的设备上自动适应布局,并支持水平和垂直居中。
2.使用Dimension单位:在开发中,应该避免使用绝对单位像素(px),而是使用dp或sp。dp是一个相对单位,它会根据屏幕密度的不同而改变,而sp则是专门用于调整字体大小的。
3.控制图片的尺寸:在设计导航栏时,应该遵守一定的设计规范。例如,在Android中,导航栏的高度应该为56dp,而左、右侧按钮的大小通常为48dp。如果需要显示图标,应该使用可缩放矢量图形(svg),这样可以保证在不同的分辨率下保持清晰度。
三、导航栏适配的实现方法:
针对不同的开发平台和框架,导航栏适配的实现方法也有所不同。以下是一些常见的方法:
1.Android平台
在Android中,可以使用ConstraintLayout布局来实现导航栏的适配,如下所示:
```xml
android:id="@+id/navigation_bar" android:layout_width="match_parent" android:layout_height="56dp"> android:id="@+id/navigation_title" android:text="Title" android:layout_width="wrap_content" android:layout_height="wrap_content" android:layout_marginStart="16dp" app:layout_constraintStart_toStartOf="parent" app:layout_constraintTop_toTopOf="parent" app:layout_constraintBottom_toBottomOf="parent" /> android:id="@+id/navigation_left_button" android:src="@drawable/ic_back" android:layout_width="48dp" android:layout_height="48dp" android:layout_marginStart="8dp" app:layout_constraintStart_toEndOf="@id/navigation_title" app:layout_constraintTop_toTopOf="parent" app:layout_constraintBottom_toBottomOf="parent" /> android:id="@+id/navigation_right_button" android:src="@drawable/ic_menu" android:layout_width="48dp" android:layout_height="48dp" android:layout_marginEnd="16dp" app:layout_constraintEnd_toEndOf="parent" app:layout_constraintTop_toTopOf="parent" app:layout_constraintBottom_toBottomOf="parent" /> ``` 在以上代码中,可以看到使用了约束布局来设置导航栏的位置和大小,同时使用Dimension单位来设置组件的大小。同时在ImageView中使用了64dp的尺寸来设置图标大小。 2.iOS平台 在iOS中,可以使用Auto Layout来实现导航栏的适配,如下所示: ```swift let navigationBar = UIView(frame: CGRect(x: 0, y: 0, width: UIScreen.main.bounds.width, height: 56)) let navigationTitle = UILabel() navigationTitle.text = "Title" navigationTitle.translatesAutoresizingMaskIntoConstraints = false navigationBar.addSubview(navigationTitle) navigationTitle.leftAnchor.constraint(equalTo: navigationBar.leftAnchor, constant: 16).isActive = true navigationTitle.centerYAnchor.constraint(equalTo: navigationBar.centerYAnchor).isActive = true navigationTitle.heightAnchor.constraint(equalToConstant: 44).isActive = true let navigationLeftButton = UIButton() navigationLeftButton.setImage(UIImage(named: "back"), for: .normal) navigationLeftButton.translatesAutoresizingMaskIntoConstraints = false navigationBar.addSubview(navigationLeftButton) navigationLeftButton.leftAnchor.constraint(equalTo: navigationTitle.rightAnchor, constant: 8).isActive = true navigationLeftButton.centerYAnchor.constraint(equalTo: navigationBar.centerYAnchor).isActive = true navigationLeftButton.widthAnchor.constraint(equalToConstant: 48).isActive = true navigationLeftButton.heightAnchor.constraint(equalToConstant: 48).isActive = true let navigationRightButton = UIButton() navigationRightButton.setImage(UIImage(named: "menu"), for: .normal) navigationRightButton.translatesAutoresizingMaskIntoConstraints = false navigationBar.addSubview(navigationRightButton) navigationRightButton.rightAnchor.constraint(equalTo: navigationBar.rightAnchor, constant: -16).isActive = true navigationRightButton.centerYAnchor.constraint(equalTo: navigationBar.centerYAnchor).isActive = true navigationRightButton.widthAnchor.constraint(equalToConstant: 48).isActive = true navigationRightButton.heightAnchor.constraint(equalToConstant: 48).isActive = true ``` 在以上代码中,使用了Auto Layout来设置导航栏的位置和大小,同时使用了Point单位来设置组件的大小。在UIButton中使用了48pt的尺寸来设置图标大小。 3.React Native平台 在React Native中,可以使用Flexbox布局来实现导航栏的适配,如下所示: ```javascript ``` 在以上代码中,使用了Flexbox布局来设置导航栏的位置和大小,同时使用了PixelRatio单位来设置组件的大小。在Image组件中使用了48px的尺寸来设置图标大小。 四、总结 导航栏是APP中非常重要的组件之一,为了保证在不同的设备上正常显示,需要进行适配。在Android中,可以使用约束布局来实现导航栏的适配;在iOS中,可以使用Auto Layout来实现导航栏的适配;在React Native中,可以使用Flexbox布局来实现导航栏的适配。无论采用哪种方法,都应该遵守一定的设计规范,并使用正确的单位来设置组件的大小。